You can change any craft project with aluminum metallic pigments. These pigments give a shiny look that reflects light and stands out. Artists use them a lot in painting, especially with acrylics, gouache, and oil paints from brands like Winsor & Newton and Holbein. Picture your canvas shining with real silver or your homemade cards sparkling outside. Try mixing these pigments and watch how they make your art different. Don’t worry about trying new things—your creativity can shine too.
Key Takeaways
- Aluminum metallic pigments make crafts look bright and shiny. They also help crafts last longer. You can use them in painting, resin art, clay, and fabric design.
- Mix pigments slowly with resin or paint. This helps you get the best shine. Use a small amount first. Add more if you need it.
- You can make your own metallic paints, inks, and jewelry. These will have special colors and shiny finishes that stand out.
- Always use pigments safely. Work in a place with fresh air. Wear gloves to protect your hands. Keep pigments in dry, labeled containers. Store them away from sunlight.
- Try layering and mixing pigments in your crafts. This makes your work look cool and magical. You can have fun and be creative.
Aluminum Metallic Pigments Overview
What They Are
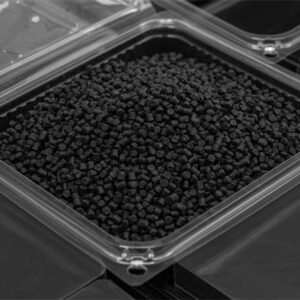
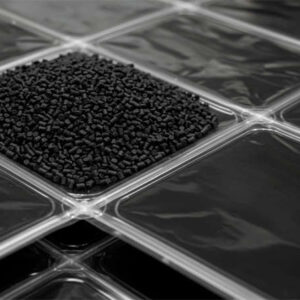
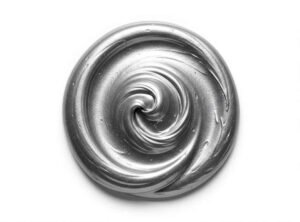
You may wonder why aluminum metallic pigments are so unique. These pigments are made from very pure aluminum powder. The powder is pressed into thin, flat flakes. The flakes look like tiny sheets or leaves. Makers cover these flakes with layers like silica or metal oxides. Sometimes, they use special polymers for the coating. This coating helps the flakes stay shiny and safe. It also keeps them stable for a long time. Some coatings add extra colors, like gold or rainbow. That is why some pigments look colorful. These pigments stay bright and do not tarnish. They work well in water or outside.
Tip: Aluminum metallic pigments are non-toxic and safe for most crafts. You can use them in painting, casting, or jewelry making.
Benefits in Crafts
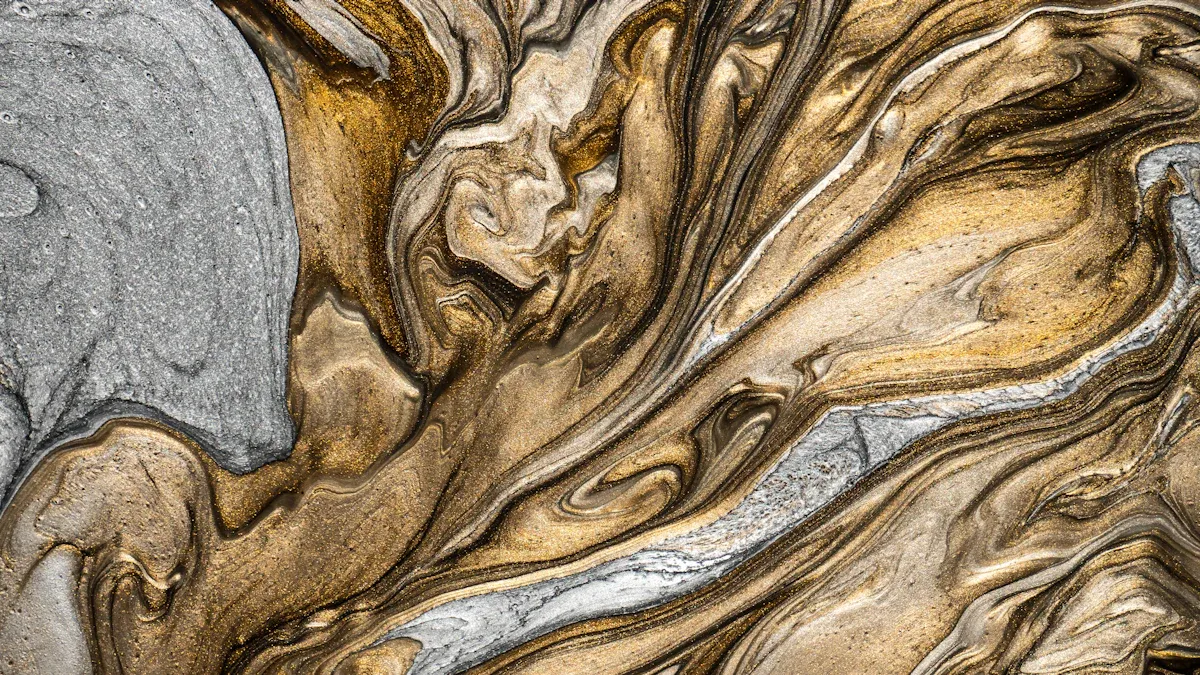
Aluminum metallic pigments add lots of shine to crafts. They give a bright, metallic look that reflects light. Your art can shimmer or sparkle when you move it. Sometimes, the color even changes as you look at it. You can use them alone for a strong silver look. You can also mix them with other colors for new effects.
Here’s a table to show why aluminum metallic pigments are special:
| Feature | Aluminum Metallic Pigments | Other Metallic Pigments |
|---|---|---|
| Shape | Thin, flat flakes | Spheres or mica flakes |
| Shine | Very bright, reflective | Less shiny or iridescent |
| Durability | High, resists tarnish | Some may darken or fade |
| Color Effects | Silver, gold, rainbow | Iridescent or dull metallic |
- You can use these pigments in resin art or furniture.
- They also work for big projects like river tables.
- Some pigments make holographic or color-shifting effects.
- These effects make your crafts look magical.
- The special flake shape adds depth and a pro finish.
If you want crafts that stand out and last, aluminum metallic pigments are a smart pick.
Resin Art
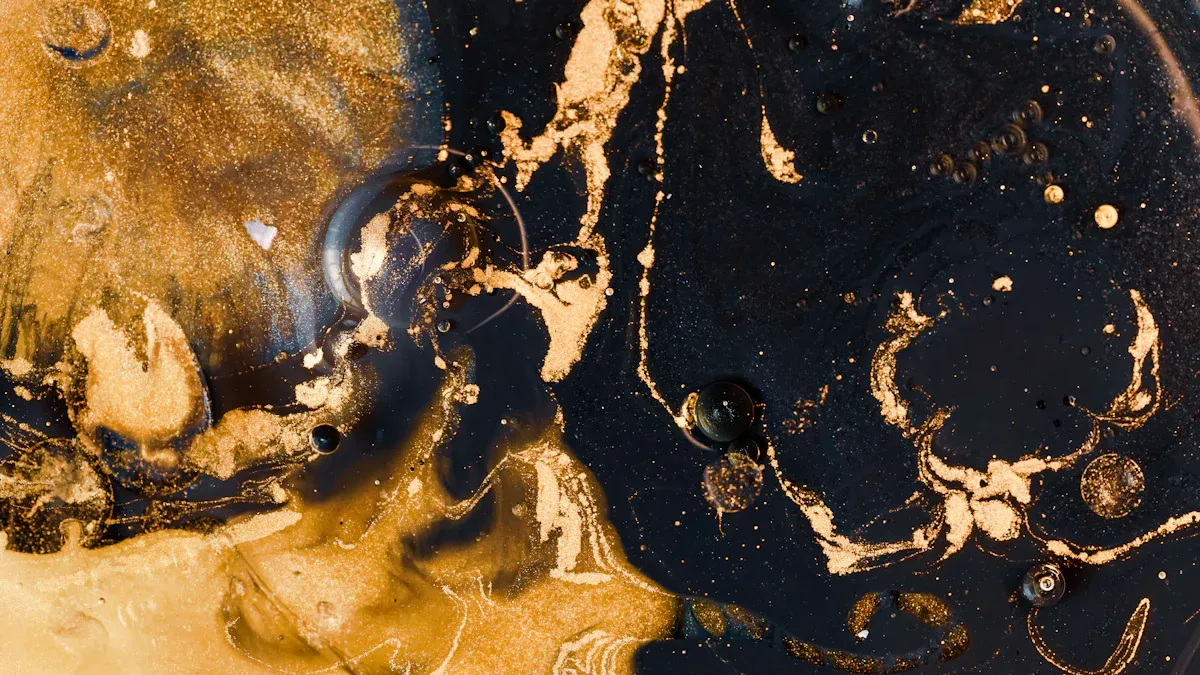
Shimmer Effects
You want your resin art to shine and catch the eye. Aluminum metallic pigments help you do just that. When you mix these pigments into resin, you get a glossy, metallic finish that looks almost like real metal. The shimmer changes as you move your piece, making it look lively and full of energy. Many artists love using these pigments for river tables, coasters, and jewelry. You can also try the Cold Cloisonné technique. This method uses aluminum wire to create shapes and outlines on your artwork. You fill these wire compartments with colored resin. The wire is easy to bend, so you can make cool designs without much effort. Your finished piece will have bright, shiny lines and bold colors.
Tip: If you want extra sparkle, dust a little pigment on the mold before pouring the resin. This trick gives your art a smooth, shiny surface.
Mixing Tips
Getting the right mix is important for a great finish. You need to balance the resin and aluminum metallic pigments. Most artists use a 1:1:1 ratio. That means equal parts of resin Part A, Part B, and pigment. If you want a stronger metallic look, you can add more pigment, but don’t go overboard. Too much pigment can make your art look dull or cause swirling. Some people use a 50/50 mix of resin and pigment, but this can make the piece heavier and less shiny. Try adding just 5% pigment for a bright finish. Always mix slowly and make sure there are no clumps. You can tint your resin black or brown to make the metallic effect pop. After curing, buff your piece with steel wool or add a clear coat for extra shine.
Here’s a quick guide for mixing:
| Step | What to Do |
|---|---|
| Measure | Equal parts resin and pigment |
| Mix | Stir slowly, avoid clumps |
| Pour | Fill mold, brush for even coverage |
| Cure | Let set, then finish as you like |
Remember, practice makes perfect. Try different ratios and see what works best for your style.
Metallic Paints
Custom Paints
You can make your own metallic paints at home. When you use aluminum metallic pigments, your paint gets a bright, shiny look that stands out. These pigments work better than many traditional options. You get outdoor durability and weathering resistance, so your paint lasts longer on cars, bikes, or garden decorations. The special flakes in these pigments reflect light in cool ways. Some flakes give you high gloss, while others help protect surfaces from scratches and rust. You can even find pigments made with advanced methods that look like tiny mirrors. These paints stick well to surfaces and resist fading, so your projects stay beautiful.
Tip: Mix the pigment into clear acrylic or oil paint. Start with a small amount and add more until you see the shine you want.
Here’s a quick look at why these pigments are great for custom paints:
| Feature | Benefit |
|---|---|
| High Gloss | Super shiny finish |
| Scratch Resistance | Paint stays smooth |
| Outdoor Durability | Lasts in sun and rain |
| Easy Mixing | Works with many paint types |
Application Ideas
You can use metallic paints in lots of fun ways. Try painting picture frames, flower pots, or even shoes. Your crafts will look modern and eye-catching. If you want a bold accent wall, use metallic paint for a cool effect. You can also add details to furniture or create patterns on canvas. Some people use these paints for model cars or toys. The shine makes every project pop.
- Paint rocks for garden art.
- Decorate wooden boxes or trays.
- Add shimmer to holiday ornaments.
- Make custom phone cases.
You don’t need fancy tools. Use a brush, sponge, or even your fingers to spread the paint. Experiment with layers for extra depth.
When you use aluminum metallic pigments, your paint projects become unique. You get a finish that looks professional and lasts a long time.
Polymer Clay
Blending Pigments
You can make your polymer clay projects look amazing with aluminum metallic pigments. These pigments come from real aluminum, so you get a true metal shine. When you blend them into your clay, you create a smooth, almost liquid metal effect. Your clay will look like it has real silver or platinum inside. This makes your jewelry, charms, or figurines stand out from the crowd.
Here’s how you can blend these pigments into your clay:
- Knead a small amount of pigment into your raw clay for an all-over metallic look.
- Mix the pigment with a little alcohol and spray it onto the clay for a soft, floating metal effect.
- Try blending different pigment colors for a custom metallic shade.
Tip: Always start with a little pigment. You can add more if you want a brighter shine.
You might notice that the clay feels a bit smoother after you add the pigment. The fine texture of the aluminum flakes gives your project a soft, silky finish. If you want to create patterns, press a texture sheet onto the clay after blending in the pigment. The metallic shine will highlight every detail.
Surface Highlights
You can also use aluminum metallic pigments to add highlights to the surface of your clay. This method works great if you want to make certain areas pop. Just brush the pigment onto the raw clay before baking. The pigment sticks to the high spots and gives a bright, shiny accent.
Here are some ways to use surface highlights:
- Brush pigment onto raised designs for a dramatic effect.
- Use a soft brush to dust pigment over texture patterns.
- Combine with other metallic shades for a layered look.
| Method | Result |
|---|---|
| Brushing | Bold, shiny highlights |
| Spraying | Soft, floating metal effect |
| Texture Sheet | Eye-catching metallic finish |
You can seal your finished piece with a clear glaze to protect the shine and keep your project looking new. Try these techniques and see how your polymer clay crafts transform with a touch of metallic magic!
DIY Inks
Making Inks
You can make your own metallic ink at home with aluminum metallic pigments. This process feels like a fun science experiment. Start by choosing a water-based binder, like clear acrylic medium or even simple white glue mixed with water. Add a small amount of aluminum metallic pigment to the binder. Stir slowly until the mixture looks smooth and shiny. If you want a thicker ink, add more pigment. For a lighter, more transparent look, use less pigment.
Tip: Use a glass jar with a tight lid to store your ink. Shake it before each use to keep the pigment mixed.
You can also try adding a drop of dish soap. This helps the pigment spread evenly on paper or other surfaces. Test your ink on a scrap piece of paper. If you see streaks, mix a little more. You can adjust the thickness by adding water or more binder. Making your own ink lets you control the shine and texture. You get a custom metallic look every time.
Craft Uses
Your homemade aluminum metallic ink works on many craft projects. You can paint ornaments, decorate greeting cards, or add shimmer to journals. Many crafters use these inks for toy paints and crafts paints. The metallic luster makes every project look special and eye-catching.
Here are some crafts that benefit most from aluminum metallic pigment-based inks:
- Ornaments for holidays or home decor
- Painted toys and figurines
- Decorative boxes and frames
- Handmade cards and invitations
Water-based aluminum pigments work well on surfaces like wood, paper, and even some plastics. They give a bright, metallic finish that stands out. You can use a brush, sponge, or even a stamp to apply the ink. Try layering the ink for a bolder effect. If you want to add extra sparkle, dust a little dry pigment on top while the ink is still wet.
Your crafts will shine with a metallic luster and artistic look. Every project becomes a unique piece of art when you use your own DIY metallic ink.
Paper Crafts
Scrapbooks
You can make your scrapbook pages shine with aluminum metallic pigments. These pigments add a bright, reflective touch that makes your memories pop. Try brushing a little pigment on the edges of your photos or paper shapes. You will see a cool metallic border that catches the light. You can also mix the pigment with glue and paint it onto die-cut letters or numbers. Your titles will look bold and special.
Here are some fun ways to use aluminum metallic pigments in your scrapbook:
- Dust pigment on stickers for a custom look.
- Mix pigment with clear glue to make shiny accents.
- Brush pigment on paper flowers for a sparkling effect.
- Stamp designs with pigment ink for a metallic finish.
Tip: Use a soft brush to spread the pigment. You can layer colors for a rainbow effect.
You can create themed pages for birthdays, holidays, or travel. The metallic shine makes each page unique. Your friends will notice the shimmer when they flip through your scrapbook.
Journals
You can decorate your journal covers and pages with aluminum metallic pigments. These pigments help you turn a plain notebook into a work of art. Try mixing pigment with acrylic medium and painting shapes or borders. You can also use a stencil and dab pigment through it for neat patterns.
Here’s a table with easy ideas for your journal:
| Technique | Result |
|---|---|
| Stenciling | Crisp metallic shapes |
| Border painting | Shiny page edges |
| Lettering | Bold, reflective text |
| Doodling | Sparkling sketches |
You can write your name on the cover with pigment ink. Your journal will stand out on your desk. You can also add metallic highlights to your drawings or notes. The shine makes your writing look special.
Try using metallic pigment on the first page of your journal. You will start every entry with a little sparkle!
Fabric Design
Textile Patterns
You can make your fabrics look amazing with aluminum metallic pigments. These pigments give your textiles a shiny, metallic finish that catches the light. You might wonder how to get that effect on cloth. One popular way uses aluminum-based dye lakes. You start by extracting natural dyes from plants like onion peel, Canadian Goldenrod, or pomegranate peel. You boil these materials in water to get the color out. Next, you add aluminum salts to the dye at a pH of about 5. This step makes the dye form solid aluminum-dye complexes, called dye lakes. These dye lakes work as concentrated color products. You can use them directly to dye fabric or mix them with other mordants.
When you use aluminum-based dye lakes, you get stable and bright colors. These colors stay strong even after washing. You can create patterns by using stencils, stamps, or brushes. Try painting stripes, dots, or even your initials. You can also dip the fabric in the dye lake for an all-over metallic look. The shine from aluminum pigments makes your patterns pop.
Tip: Test your pattern on a small piece of fabric first. You can see how the color looks before you work on a big project.
Fabric Mediums
You can use different mediums to apply aluminum metallic pigments to fabric. Some people mix the pigment with textile paint or fabric glue. This method lets you paint designs right onto shirts, bags, or hats. You can also use the dye lake method for a more natural look. The aluminum-dye lakes stick well to cotton, linen, and silk. You don’t need fancy equipment. You can use brushes, sponges, or even your fingers.
Here’s a table to help you choose the best medium:
| Medium | How to Use | Best For |
|---|---|---|
| Textile Paint | Mix pigment, paint design | T-shirts, canvas |
| Fabric Glue | Brush on, add pigment | Patches, accents |
| Dye Lake | Dip or paint fabric | Scarves, dresses |
You can combine mediums for unique effects. Try painting a base layer with dye lake, then add highlights with pigment and glue. Your fabric will have depth and sparkle.
Don’t be afraid to experiment. You might discover a new favorite technique for your next textile project!
Candle & Soap
Safe Use
You want your candles and soaps to look great, but safety is important. Aluminum metallic pigments can make colors bright and shiny, but you must use them safely. Most aluminum-processed dyes, called lakes, work well in bath bombs and cold process soap. They stay in place and do not spread into other parts of your soap. You should not use too much pigment. Too much color can make your soap look messy or even stain your skin.
Here are some key safety tips for using aluminum metallic pigments in candles and soaps:
- Always pick FDA-approved cosmetic color additives for soap and candles.
- Bath bomb lakes made with aluminum, barium, or calcium are safe, except blue lakes.
- Iron oxide pigments are natural and stable. They do not move in soap.
- Products marked GRAS (Generally Recognized As Safe), like cocoa powder, are good for coloring soap.
- Fabric dyes are not safe for soap or anything used on skin.
- Even though soap does not have to follow FDA color rules, you should still follow Consumer Product Safety Commission guidelines.
Tip: Begin with a small amount of pigment. You can add more if you want a stronger color.
Metallic Finishes
You can make candles and soaps look shiny with aluminum pigments. These pigments give your crafts a bright, pearly shine that stands out. There are many ways to use them. Try mixing aluminum pigment with mica powder for a deeper shine. You can also mix different pigment colors to make new shades. If you want a rainbow shine, mix aluminum pigment with interference mica pigments. These have a special layer that makes your candles and soaps change color in the light.
Here is a table with popular ways to get metallic finishes:
| Technique | Result |
|---|---|
| Mix aluminum + mica | Rich, metallic shine |
| Blend pigment colors | Custom metallic hues |
| Add interference mica | Iridescent, shimmering effect |
| Use transparent medium | Layered, deep metallic look |
You can dust dry pigment on candles for a sparkling top. For soap, mix pigment into the base or swirl it on top for a marbled look. Clear mediums help you add layers of shine and depth.
Your candles and soaps will look cool and stand out. Try different mixes and see which metallic finish you like most!
Jewelry
Resin Jewelry
You can make resin jewelry shine with aluminum metallic pigments. These pigments give a bright, shiny look. Your jewelry will stand out and look special. Mix a little pigment into the resin. You will see a rich, sparkling effect. The flat particles reflect light and make it glitter. You do not need much to see a big change.
You can try mixing aluminum pigments with inks or glitters. This makes your jewelry look different and extra shiny. Pour the resin into molds for pendants or rings. The metallic shine makes your designs pop. Your jewelry will look fancy and cool.
Tip: Stir the pigment in slowly so there are no clumps. You can use more than one color for a layered look.
Here is a simple guide for using aluminum metallic pigments in resin jewelry:
| Step | What to Do |
|---|---|
| Measure | Add a small bit of pigment to resin |
| Mix | Stir gently for even sparkle |
| Pour | Fill the mold and let it harden |
| Finish | Sand and polish for more shine |
Your jewelry will look neat and shiny. People will notice how nice it looks!
Clay Jewelry
You can use aluminum metallic pigments to make clay jewelry look great. Mix the pigment into the clay for a shiny finish. Or brush it on top for bright highlights. Both ways make your jewelry look modern and cool.
Anodizing is a way to add color and shine to aluminum jewelry. This process opens the metal’s surface. You can dye it and then seal in the color. Many people like anodizing because it is cheap and lasts a long time. You can also use dichroic glass. This uses vaporized aluminum to coat glass. It gives a shiny, metallic look that is permanent. Earrings and pendants look amazing with this method.
Try new ways to use these techniques. You might find a fun way to make your jewelry sparkle!
Home Decor
Upcycling Aluminum
You can use old aluminum cans and foil for home decor. Instead of throwing them away, turn them into art or jewelry. You can also make wall hangings. Aluminum is easy to cut and bend. You can press shapes into it with simple tools. Add aluminum metallic pigments to make your art shine. These pigments stick to metal and give a bright finish.
Upcycling aluminum is good for the planet. When you reuse things, you save energy and cut down on trash. Look at this table to see how upcycling aluminum helps the environment:
| Environmental Benefit | Explanation |
|---|---|
| Reducing Landfill Waste | Keeps cans and foil out of landfills, lowering pollution. |
| Conserving Resources and Energy | Saves natural resources and energy by reusing what you already have. |
| Lowering Industrial Emissions | Less need for new products means fewer factory emissions and a smaller carbon footprint. |
| Promoting Circular Economy | Encourages you to reuse materials, supporting a more sustainable lifestyle. |
| Fostering Creativity & Community | Inspires creative projects and brings people together for eco-friendly crafting. |
| Cost-Effectiveness | Lets you make affordable decor without buying new supplies. |
| Promoting Sustainable Living | Helps you build habits that protect the environment for the future. |
Tip: Press patterns into foil to make embossed art. Brush on metallic pigment for a cool, shiny look.
Faux Metal Effects
You can make fake metal finishes for your home decor. Use aluminum metallic pigments to get a real metal look. These pigments help you copy copper or bronze without spending a lot. Here’s how you can do it:
- Mix aluminum or metallic pearl pigments into clear glaze or water-based polyurethane.
- Brush, sponge, or rag the mix over painted surfaces for a special look.
- Change the amount of pigment to get more or less shine. Mix small amounts for better control.
- For an old or industrial style, layer metallic paints with patina glazes or use dry brushing for texture.
You can also use metallic leaf for extra shine. Try stencils or rag rolling for cool patterns. Some people use paints with real metal bits. These paints change color over time for a natural patina.
- Layer metallic paints for a bronze or platinum look.
- Use patina washes for an old, antique finish.
- Try distressed aluminum leaf for a modern, industrial style.
Your home decor will look cool and different. With some practice, you can make any surface look like real metal!
Musical Instruments
Custom Finishes
You can make your musical instruments look new with aluminum metallic pigments. These pigments work well on electric guitars, basses, and drum kits. You can pick how shiny or bold you want your instrument to be. Aluminum pigments mix with coatings like nitrocellulose lacquer, polyurethane, clear coats, and epoxy resins. You can also mix them with other colors or thin them with water or solvents. This helps you make custom finishes that fit your style.
Here are some ways to use aluminum metallic pigments:
- Brush the pigment on for a smooth coat.
- Dab with a sponge for cool textures.
- Wipe the pigment for a soft, blended look.
You need to dissolve the pigment first. This makes it spread evenly. When you finish, your instrument can shine like a mirror or have a sparkling metallic look. Light bounces off and makes your guitar or drum sparkle on stage.
Tip: Clean and sand the surface before you start. This helps the pigment stick better and last longer.
Unique Effects
Aluminum metallic pigments help you make cool effects. The size of the pigment pieces changes the look. Nano-sized pigments give a glossy, mirror finish. Bigger flakes make a soft shimmer that looks fancy. These finishes add depth and make your instrument look special.
Here is a table to show how the size changes the finish:
| Particle Size | Effect on Finish |
|---|---|
| Nano-pigments | Mirror-like, glossy |
| Large flakes | Soft, shimmering glow |
You can mix pigments for a layered look. The shiny surface hides small scratches and makes cleaning easy. Your instrument will look new for a long time. You can use stencils or tape to make patterns and stripes.
- Layer different metallic shades for a custom look.
- Use metallic pigments to highlight curves or edges.
- Add a clear coat to keep the shine safe.
Your musical instrument will look like art. The finish will stand out and show your style.
3D Printing
Pigment Use
You can make your 3D prints look really cool with aluminum metallic pigments. These pigments give your projects a shiny, metallic finish. If you want your prints to stand out, try adding aluminum pigments to your filament or resin. The pigments are tiny, flat pieces, usually between 1 and 50 microns. When you print with them, you get neat effects like color shifting and iridescence. Your object might even look like it changes color when you move it!
A common way to use these pigments is with fused deposition modeling (FDM). You can buy PLA or ABS filaments that already have aluminum pigments inside. These filaments work just like normal ones, but your prints will shine like metal. If you use resin printers, you can mix the pigments into the resin for the same shiny effect.
For harder projects, you might hear about slurry-based binder jetting. In this method, aluminum powders are mixed into a thick liquid with special chemicals. The printer puts down the slurry in layers, then dries each one. After printing, you heat the object to make it strong. Sometimes, people add magnesium to help the metal pieces stick together better. This way, you get tough, shiny parts that look like real metal.
Tip: Always mix pigments well so there are no clumps. Try a small test print first to see how the finish turns out.
DIY Hardware
You can use aluminum metallic pigments to make your own special hardware and decorations. These pigments are great for printing things like keychains, badges, or small gears that need to look awesome. If you want a cool effect, look for filaments with color-shifting pigments. These make your prints change color when you look at them from different sides.
Here’s a simple table to help you pick what to print:
| Object Type | Why Use Aluminum Pigments? |
|---|---|
| Keychains | Shiny, eye-catching finish |
| Decorative Badges | Iridescent, color-shifting effects |
| Prototyping Parts | Stand out for presentations |
| Security Tags | Harder to copy, unique appearance |
You can also try changing the surface. Some people coat aluminum powders with a thin layer of polymer before mixing them into resin. This helps the pigment spread out and lets UV light harden the resin better. Your prints will look smoother and more even.
If you want to try new things, start with small projects. Mix different pigments to make new colors. Show off your creativity with every print!
Mixed Media
Layering
You can make your mixed media art pop by layering aluminum metallic pigments. Start with a base layer of paint, paper, or fabric. Sprinkle or brush a little pigment on top while the surface is still wet. The pigment will stick and shine. Try adding more layers with glue, gel medium, or even clear tape. Each layer catches the light in a new way.
Want to create depth? Use different colors or sizes of pigment flakes. You can press pigment into modeling paste or texture gel for a raised, shiny effect. If you like collage, add pigment between layers of paper or fabric. Your art will look rich and full of life.
Tip: Let each layer dry before adding the next. This keeps your colors bright and your textures crisp.
Here’s a quick guide for layering:
| Step | What to Do |
|---|---|
| 1. Base | Paint or glue your first layer |
| 2. Pigment | Sprinkle or brush on pigment |
| 3. Seal | Add clear medium or glue |
| 4. Repeat | Build more layers as you like |
Creative Ideas
You can use aluminum metallic pigments in so many fun ways. Try mixing them with watercolor for a sparkling wash. Add them to stamping ink for shiny prints. If you like drawing, dust pigment over glue lines for a glowing outline.
Here are some creative ideas to try:
- Make greeting cards with metallic highlights.
- Decorate journal covers with layered pigment designs.
- Add shimmer to handmade bookmarks or tags.
- Use pigment in art journaling for bold, shiny accents.
Don’t be afraid to experiment! Sometimes the best art comes from trying something new. Mix, layer, and play with your pigments. Your mixed media projects will shine with your own creative touch.
Safety Tips
Handling Pigments
You want your craft time to be fun and safe. Pigments can get messy, so you need to handle them with care. Always work in a space with good airflow. Open a window or use a fan. If you spill pigment, clean it up right away. You do not want dust floating around. Wear gloves to keep your hands clean. Some people use a mask if they work with powders often. You can use a small scoop or spoon to move pigment from the jar. Never touch your face while you work. Wash your hands after you finish.
Here are some easy safety steps:
- Put on gloves before you start.
- Use a mask if you see dust in the air.
- Keep food and drinks away from your workspace.
- Clean your table after you finish.
- Wash your hands with soap and water.
Tip: If you get pigment on your skin, wash it off with warm water. Do not use harsh chemicals.
You can keep your workspace safe by following these steps. You will enjoy your craft time more when you do not worry about messes.
Storage
Pigments last longer when you store them the right way. You need to keep them dry and away from sunlight. Use jars with tight lids. Label each jar so you know what is inside. Store your pigments on a shelf or in a drawer. Do not put them near heat or water. If you have pets or small kids, keep pigments out of reach.
Here is a table to help you remember good storage habits:
| Storage Tip | Why It Helps |
|---|---|
| Tight lids | Stops spills and keeps air out |
| Dry place | Prevents clumping |
| Away from sunlight | Keeps colors bright |
| Label jars | Avoids mix-ups |
| Out of reach | Keeps pets and kids safe |
You can use small boxes or bins to organize your jars. This makes it easy to find what you need.
When you store pigments well, you save money and keep your crafts looking great. Good habits make your craft space safer and more fun.
You have so many ways to make your crafts shine. Try new ideas and see what works for you. Mix colors, layer textures, and play with different styles. Always remember to stay safe when you work with pigments. If you discover a cool trick or favorite project, share it with others. Your creativity can inspire someone else. Ready to start your next masterpiece?
FAQ
Can you mix aluminum metallic pigments with any paint?
Yes, you can mix these pigments with acrylic, oil, or watercolor paints. Always start with a small amount. Stir well to get a smooth, shiny finish. Test on a scrap before painting your main project.
Are aluminum metallic pigments safe for skin contact?
Most aluminum pigments are safe for crafts, but you should not use them directly on skin. If you make soap or bath bombs, pick pigments labeled as cosmetic grade. Always check the product label for safety information.
How do you clean up aluminum pigment spills?
Use a damp cloth to wipe up powder spills. If you spill pigment on fabric, shake off the excess first. Wash your hands with soap and water after handling pigments. Keep your workspace tidy to avoid messes.
Do aluminum metallic pigments fade over time?
Aluminum pigments resist fading and tarnishing. Your crafts will keep their shine for years. Store finished projects away from direct sunlight to help colors stay bright.
What is the best way to store aluminum metallic pigments?
Keep pigments in jars with tight lids. Store them in a cool, dry place. Label each jar so you know what’s inside. Avoid putting pigments near heat or moisture.